
Gutters and downspouts are essential components of any roofing system. They help to collect and direct rainwater away from the foundation of a building, preventing costly water damage. Installing gutters and downspouts can be a complicated process, but with proper planning it can be done quickly and safely.
Contents:
When installing gutters and downspouts, one must attach hangers or brackets for roofing to secure them in place. Hangers are typically made of aluminum or plastic material that is bolted directly onto the edge of the gutter at regular intervals along its length. The other end is then attached to the fascia board which runs horizontally beneath the eaves of a house’s roofline. Brackets are designed differently; they mount flush against the side wall of a building with screws or nails providing additional support for heavier loads such as snowfall on a rooftop during winter months.
Hangers come in many sizes so it’s important to measure carefully before purchasing them for installation purposes. The size should correspond with both the width of your gutter (4 inch, 5 inch etc.) As well as its weight capacity – if you have larger pieces installed then you will need hangers that can bear more weight than those intended for smaller pieces. Some hanger models offer an adjustable hook that allows you to adjust their length depending on where exactly you want them placed on your home’s exterior walls – this feature makes installation even easier!
Brackets also come in different shapes and sizes according to their intended use – there are those designed specifically for attaching gutters while others may work better when securing downspout pipes together or mounting rain chains alongside existing structures like balconies/decks etcetera. Some models include built-in flashing tabs which provide extra protection against moisture entering through gaps between metal surfaces; these tabs should always be used if possible since they create an airtight seal around all connected parts helping keep out potential water leakage issues over time!
Gutter and Downspout Basics

Gutter and downspout systems are essential components of a well-functioning roof. Without these features, rainwater could easily cause damage to the home’s exterior walls or foundation. Installing gutters and downspouts correctly is important for ensuring that your roof functions properly in all weather conditions. Understanding some basics about gutter and downspout installation can help you make sure that you’re installing them correctly.
When it comes to selecting gutters and downspouts, there are several factors to consider including size, materials, shape, color, and slope. Gutters come in a variety of sizes ranging from 4 inches up to 8 inches wide. It’s best practice to choose larger sizes for maximum efficiency since they can handle more water volume than smaller sizes. Materials such as aluminum or copper have their advantages when it comes to durability; however cost should also be considered when making a selection since metal varieties tend to be more expensive than vinyl ones. The shape of your gutter is also important since different shapes can affect its capacity; common options include K-style (which has flat backs with curved fronts) or half round styles (which has an even curve along the entire length). Color is mainly aesthetic but should still be taken into account if you want the gutters blend seamlessly with the rest of your home’s exterior design scheme; popular colors include white, black brown and bronze/copper tones depending on material type chosen earlier. Slope is another critical factor which determines how effectively water flows through the system – typically 1/4 inch per foot drop towards an end outlet where runoff leaves via a connected pipe leading away from house foundation.
When it comes time for actual installation process begins by attaching hangers at intervals along length of gutter run using special nails made specifically for this purpose; these will provide structural support so that weight load does not become too much causing sagging over time. Next step involves mounting brackets onto fascia board underneath eave edge. again use appropriate nails designed especially for this application, then simply snap lengths of pre cut guttering into place between brackets. Finally install any necessary elbow pieces allow redirection around corners as needed before connecting one side downstream end outlet piece which leads off drainage pipe located below ground level away from building.
Choosing the Right Hangers
When it comes to installing gutters and downspouts, choosing the right hangers is key. It is important that they are securely fastened to the roofing material in order to ensure proper drainage and prevent any future damage. There are several types of hangers available for use on different roof materials, such as aluminum, steel or wood.
For aluminum roofs, one option is a clip-style hanger which provides an easy way to attach gutter brackets without having to drill holes into the surface of the roofing material. These clips come with pre-drilled holes so you can easily secure them onto your gutters or downspouts with screws or nails. They also provide extra support for heavier loads and larger areas where more than one bracket may be needed.
Steel roofs require specialty hangers designed specifically for this type of material due to its greater weight capacity requirements. These heavy duty steel brackets are made from galvanized steel and feature reinforced welds that help hold up against strong winds and other weather conditions while still providing adequate drainage when installed correctly.
Wooden shingle roofs also require special attention when selecting appropriate hangers since they have a tendency to warp over time if not properly supported by quality hardware like stainless steel straps or clamps capable of holding their shape despite temperature fluctuations and moisture exposure from rainwater runoff or snowfall accumulation during winter months.
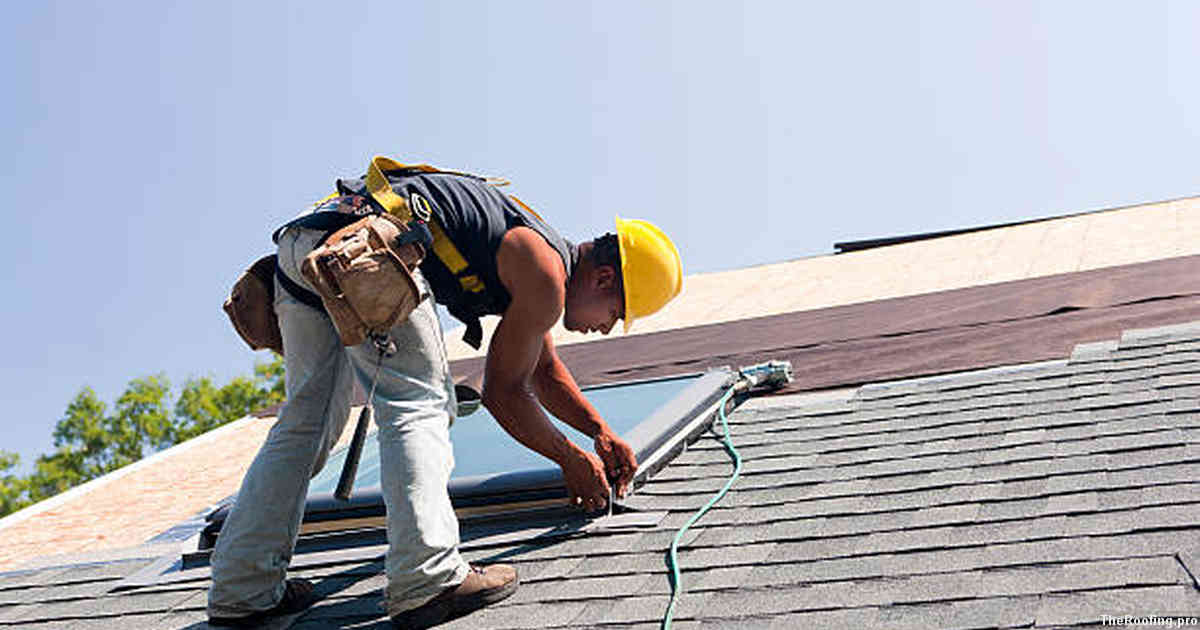
Installing Hangers on Roofing

When it comes to roofing, one of the most important steps is installing gutters and downspouts. Hangers and brackets are essential in ensuring that these pieces of equipment stay securely attached to your roof. Here we will discuss how to properly install hangers on your roofing.
The first step is to find a place where you can attach the hanger. Make sure that this spot has enough support for the weight of the gutter or downspout, as well as any other components such as flashing or sealant strips. Once you have identified an appropriate location, use screws or nails to secure the hanger into place. For added strength, be sure to use heavy-duty screws designed for outdoor use so they do not rust over time from exposure to water and weather elements.
Next, make sure that each side of the bracket is evenly spaced apart when attaching it onto your home’s fascia board or rafter tails with additional screws or nails (depending on what type of material your home’s exterior uses). When doing this step correctly, there should be no gaps between either side of the bracket once installed – if there are any spaces visible here then adjust accordingly until everything looks even before moving onto securing gutters and downspouts themselves onto these newly installed hangers/brackets.
Adjusting Angles for Proper Flow
When it comes to installing gutters and downspouts, one of the most important steps is ensuring that hangers and brackets are properly attached. This will allow for a proper flow of water away from your roof. To achieve this, you must adjust the angle of the gutter or downspout so that it slopes toward the drain outlet at an appropriate rate.
To ensure that rainwater flows correctly off your roof, start by measuring from the highest point on your roof line to where you plan to attach the gutter or downspout. Make sure there is enough space between these two points for a slight slope in order for water to run off efficiently into the drainage area below. Mark where you plan to install each hanger and bracket along with its corresponding angle before drilling any holes into your home’s siding or shingles.
For best results, use either aluminum pop rivets or stainless steel screws when attaching hangers and brackets onto both vinyl siding as well as wood surfaces like fascia boards, rafter tails, etc. Be sure that all fasteners are tightened securely so they can withstand heavy rains without coming loose over time. Be sure not to overtighten them in order to avoid damaging any materials around them.
Securing Brackets to Siding

In order to properly attach hangers and brackets for roofing, one must first secure the brackets to the siding of the home. Siding materials such as aluminum or vinyl require a different method than traditional wood siding. When dealing with aluminum or vinyl siding, it is important that you use screws specifically designed for those materials. To ensure proper security of your gutters and downspouts, these specialized screws should be corrosion-resistant so that they do not break down over time from exposure to water or moisture.
To install gutter hangers on aluminum or vinyl siding, begin by measuring out where you want each bracket placed along the wall beneath the roof edge. Make sure each bracket is evenly spaced in order to provide adequate support for your gutter system once installed. Once measured, pre-drill holes into both sides of your bracket using a drill bit compatible with metal material before securing them with either rivets or self-tapping screws designed for metal construction projects like this one. With these specialized fasteners securely in place, move onto attaching your gutters and downspouts according to manufacturer instructions provided when purchased new product materials prior to installation day.
Connecting Gutters to Downspouts

Attaching gutters to downspouts is a critical part of installing roofing systems. While it may seem like a daunting task, there are several steps that can help make the process easier and more efficient.
To begin, measure and mark where you will be attaching the gutter to the downspout. This should be done before cutting or drilling any holes in either piece so that all measurements remain consistent throughout installation. Next, cut the hole in both pieces using a drill bit or saw blade with an appropriate size for your particular materials; this step will vary depending on what type of gutter and downspout you have chosen for your roofing system.
Use screws or rivets to attach one end of the gutter onto each side of the downspout at marked locations from earlier measurements. To ensure proper sealing, it’s best practice to use sealant around each connection point after securing them together tightly with screws or rivets. Once connected properly and sealed correctly, rainwater should flow freely through your newly installed guttering system.
Keeping Gutters Clean & Clear

One of the most important aspects of installing gutters and downspouts is keeping them clean and clear. Without regular maintenance, leaves, twigs, and other debris can clog the system, preventing water from draining properly. Fortunately, there are a few simple steps homeowners can take to help keep their gutters free of debris.
To start with, it’s important to inspect the area around your roofline for potential sources of debris that could enter your gutter system. This includes checking for trees or shrubs that may be too close to the house or overhanging branches that might drop leaves directly into the gutter itself. Trimming back any vegetation in this area will go a long way towards helping maintain clean gutters throughout the year.
Make sure to install covers on all your downspouts; these will help prevent small pieces of debris from entering into pipes below ground level where they could cause blockages in drainage systems as well as possible flooding due to overflowing water above ground level. With these measures in place you should be able to enjoy peace-of-mind knowing that your gutters remain safe and functional for years to come.
Maintaining Your System

Maintaining your gutter and downspout system is important to ensure the system works properly. Regular inspections should be done, especially after a storm or heavy winds. Checking for any cracks or damages that may have occurred will help prevent potential water leakage and other related problems. If you find any damage, make sure to repair it right away before it can cause more extensive damage in the future.
In addition to inspecting for visible signs of damage, it’s also important to keep debris out of your gutters and downspouts. Leaves, twigs, and other debris can clog up these systems if not regularly removed from them. To reduce the need for frequent cleaning, consider installing leaf guards on your gutters as well as using covers over downspouts when necessary.
Check all fasteners once a year; this includes screws and bolts holding together sections of gutter as well as hangers attached directly onto roofing materials such as fascia boards or soffits beneath eaves troughs. Make sure all are securely fastened in place with no rust present on them – replacing worn-out hardware can help extend the life of your system considerably.